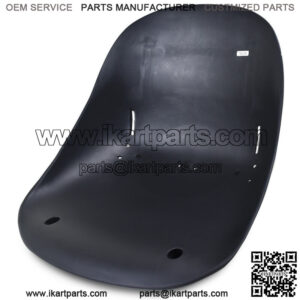
1. Have Your Kart Stood On A Trolley
Have your kart stood on a trolley. Ensure that you have a base for your seat. When your kart is on the trolley, have two round bars put underneath the kart (even some axles could work).
These are two beams that go straight across the bottom of the kart. These will keep your seat in place and ensure that it does not fall below the chassis while you are mounting the seat. Using two beams will give you a more stable base to work on.
2. Put Your Seat On The Beams
Put your seat on the beams, and ensure that the mounts match against the seat itself. Use a weight to keep the seat in place.
Flat bottomed seats are easy since they sit on the beams and the angle of the seat will be more or less accurate. If it is a rounded seat, you will need to wedge the back of the seat on the axle to ensure the angle stays the same.
3. Measure From The Front Of The Seat To The Front Carriage
Next you want to measure from the front of the seat to the front carriage of the kart using a tape measure. Note, this is the front of the chassis, not the front bumper. Be sure to measure both the left and right sides to ensure your seat is not uneven.
550mm from the front of the kart is generally a good place to start (but always check the manual for your specific kart to be 100% sure). This generally gives the 40/60 balance you are looking for and can be adjusted around 10-15mm as needed by driver preference.
4. Mark The Spots Where You Are Going To Drill
Mark the spots where you are going to drill into the sides of the seat (top half left and right sides). Mark these points using a marker and try to be as accurate as possible. If your seat isn’t fitting close to the side mounts you can use a hammer to bend them into place.
5. Drill The Holes
Drill the holes into the seat. If you prefer, you can remove the seat from the chassis to make the process easier.
6. Bolt The Seat Into The Side Mounts
Put the seat back into the chassis and bolt it into the side mounts. Make sure you use the right lengths of bolts and the right number of washers for your kart’s specifications.
7. Fasten The Bottom Part Of The Seat
You can now take the beams out from under the kart as the next part is fastening the bottom part of the seat.
This is when you can adjust the angle of your seat as you feel necessary. Make sure the bottom of your seat is parallel to the chassis. If you need it lower, the maximum should be 5mm below the chassis. If it’s is too far below the chassis, it will scrape along the track.
Also ensure that it’s not too far up as this will affect the handling of your kart. Once you’ve found your angle, use plastic spacers under the seat to keep your seat at the right angle.
8. Mark And Drill Spots For The Bottom Seat Mounts
Use the marker to mark your spots for the bottom seat mounts and drill the holes where you have marked the spots.
9. Bolt The Bottom Of Your Seat Into The Chassis Mounts
Use your spacers from step 7 to set your seat angle back to your preferred setting. Bolt the bottom of your seat into the chassis mounts.
“Keyword”
“how to adjust ninebot go kart seat”
“how to measure go kart seat”
“how to adjust car seat angle”
“kart ride height adjustment”
“go kart ride height adjustment”
“how to install a racing go kart seat”

