1. Park the vehicle on a flat surface: As with most types of maintenance on any car, the safety of the person doing the work, and anyone who happens to be close by, is the most important factor. There is a risk when you start changing your wheel bearings that your vehicle might suddenly move or roll away. Before you begin, park your vehicle on a level surface.
2. Put the vehicle in first, reverse, or neutral gear – or ‘park’ if it’s got an automatic transmission: Be sure that the handbrake is engaged as tightly as possible.
3. Use wheel chocks to secure wheels whose bearings you aren’t replacing: For added stability, it would be wise to use sturdy chocks to hold your vehicle’s wheels in place. Put one under each of the wheels on which you won’t be working, as those on which you’ll be changing the wheel bearings will be lifted off the ground. For example, you would place wheel chocks behind the rear tyres if you are fixing a front wheel bearing and behind the front tyres if you are working on a rear wheel.
4. Loosen the lug nuts and lift the wheel using a jack: You will need the vehicle to be off the ground in order to have the right measure of access to the internal parts of the wheel. This is why the jack which is usually supplied with your car is such a useful little piece of kit. But before you hoist the car partly off the ground, it’s a good move to use the wrench – which should also be part of the same tyre replacement kit – to start to loosen the wheel nuts. It’s marginally easier while the car’s still on the ground, as it helps provide some resistance against which you can work while applying force on the lug wrench which you’ll need to help you loosen them.
5. Make sure the car is secure on the jack before removing the wheel: Or preferably you should use a purpose-made axle stand, which is designed to be able to take the weight of at least one end of your car.
6. Unscrew the lug nuts and take off the wheel. If you loosened these earlier (see 4 above) this should make this easier. Keep them safe so that you don’t lose them – an upturned wheel cover could do the job – or just a saucer!
7. Remove the brake caliper. Using a socket and a ratchet, remove the bolts holding the brake caliper in place. Then remove the caliper itself using a screwdriver. When removing the caliper, take care not to let it dangle freely, as this can damage the brake hose. Instead, hook it over a secure part of the undercarriage or use a short length of string to tie it in place. A bungee cord or a bent coathanger are two items you could use to do this.
8. Remove the dust cover, cotter pin, and castle nut. You’ll find the first of these, a small plastic or metal cap, in the middle of the exposed rotor. Its job is to protect the parts which hold the rotor in place, and the best way of removing it is the cap is to grip it with a pair of pliers and tapping them with a hammer. Then unscrew the nut, and its washer, and remove them.
Warning – be sure to keep these small but important parts somewhere that they won’t be lost!
9. Remove the rotor. Hold the peg in the middle of the rotor assembly firmly with your thumb. Then, firmly but gently, hit the rotor itself with the palm of your other hand. This should loosen the wheel’s outer bearing should or force it to fall out completely. Remove the outer bearing, and finally, remove the rotor itself.
Warning – if the rotor gets stuck and you resort to a rubber mallet to hit it loose, this could damage the rotor – so only resort to this if you don’t plan to reuse the same rotor.
10. Unscrew the hub bolts and remove the old hub. The wheel bearing is inside the hub, which is usually held in place with several bolts which screw in from behind. These bolts can be tricky to reach because they’re tucked away in the car’s underbody, so a skinny socket wrench and/or a breaker bar is recommended to loosen and remove them.
11. When you’ve removed the bolts, take the hub off of the axle.
Note that if you’ve purchased a new hub assembly, at this point, you can install the new hub and put the wheel back together and you’ll be finished. To install a new set of bearings inside the hub, read on.
12. Dismantle the hub assembly. To gain access to the bearings, you’ll need to take apart the hub. You’ll probably need to use a wrench (and/or a hammer) to remove the end of the hub and any anti-lock brake wheel that may be part of your hub. A special tool may also be needed to remove the central bolt. Then, the bearing assembly should come apart easily.
13. Remove races and clean the knuckle. Removing the bearing assembly’s races usually means physically breaking them with a grinder or hammer and chisel. Because of this, you should have your replacement races ready. After removing the races, take the opportunity to clean the inside of the bearing assembly around the knuckle.
There’s usually lots of grease and grime here, so have plenty of rags handy.
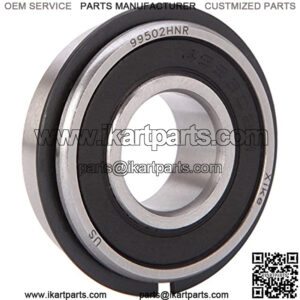
14. Install the new races and new wheel bearings. Secure the new races in place in the bearing assembly with a few taps from a hammer. Finally, grease a new inner bearing and install it in the assembly. Ensure the bearings are properly aligned, that they’re pushed in as far as they can go, and that any sealing rings are flush with the outside of the assembly.
Use lots of grease on the bearings, applying it by hand or with a special tool called a bearing packer. Rub plenty of extra grease around the outsides of your bearings and any sealing rings.
15. Replace all respective parts in reverse order. Now that you’ve changed the bearings, you basically just have to re-assemble your vehicle’s wheel. Don’t forget, however, that this means installing a new outer bearing after the rotor is in place. Put the hub assembly back together and install it on the axle shaft. Put the rotor back on and secure it back in place with its bolts. Install a new, well-greased outer bearing at this point.
16. Lightly tighten the castle nut and secure it in place with a new cotter pin. Replace the dust cap. Put the caliper and brake pads back in place and secure them with the appropriate bolts. Finally, put the tyre back in its place and secure it with the wheel nuts.
17. Once you’ve done all this, carefully lower the car back down to the ground. Using your jack, lower it and once all four wheels of the car are safely back on the ground slide it out carefully from underneath the car.
And that’s it. Time to make a cup of tea and relax – you’ve just changed a wheel bearing.
About bearings
“how to install go kart axle bearings”
“go kart axle bearing cassette”
“racing go kart axle kit”

